Wish lists are a great way to save important items for later. They are similar to carts, however, you can customise wish lists and have as many as you want. Usually, they do not expire like carts. If you wonder how to share Amazon wish list, this article will give an in-depth guide.
We will also talk about the importance of wish lists, why you should have them, how to remove people from wish lists, and how to take great advantage of them.
How to share Amazon wish list: All your questions answered
An Amazon wish is handy and very important. You can create wish lists for Christmas, a wedding, or a baby gift registry. They make it easy when you want to search for these products in the future since you do not have to search for them all over again.
You could create many lists if you wanted with a single Amazon account. Here’s how you can make (and then share) your Amazon wish lists.
How to create an Amazon wish list
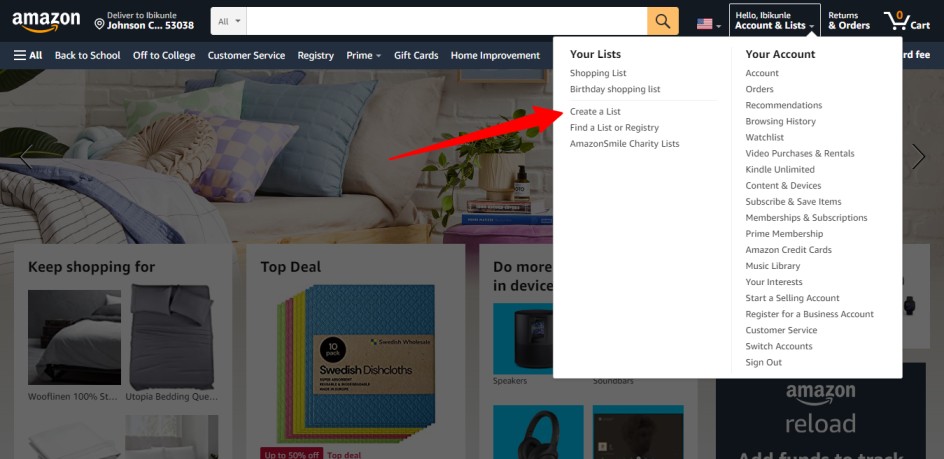
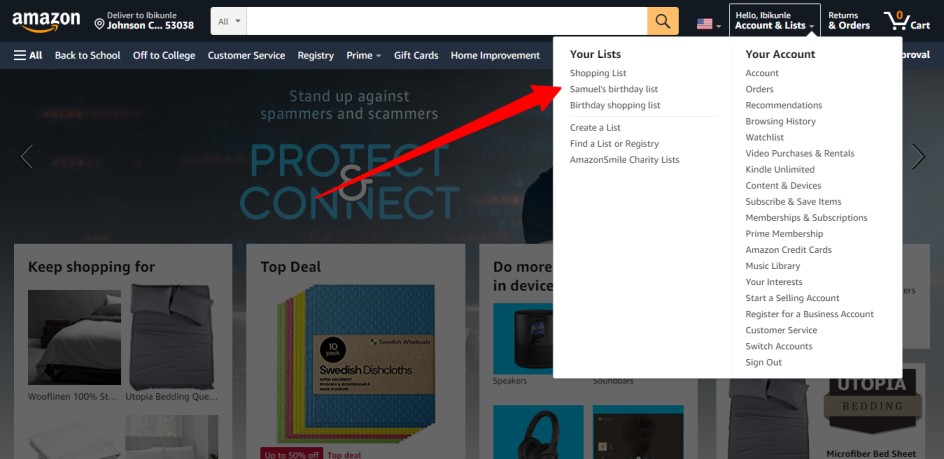
- From the homepage or any page on Amazon, hover over Accounts & Lists and select Create a List.
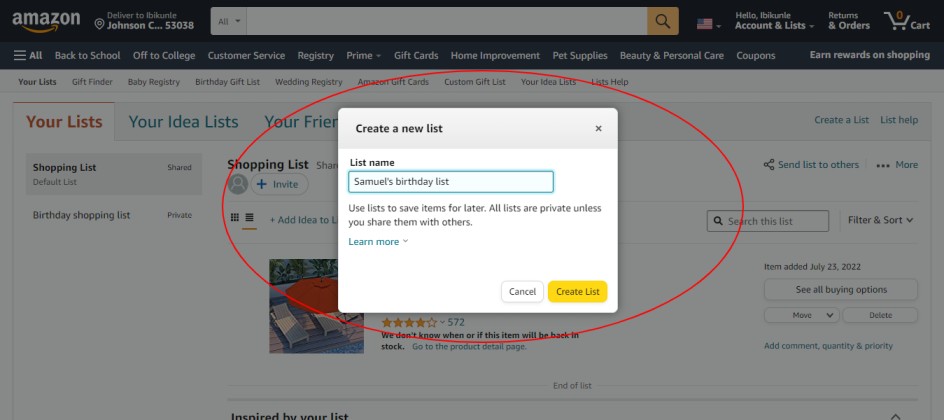
- Provide a name for your list and then select Create List. We named our list Samuel’s birthday list.
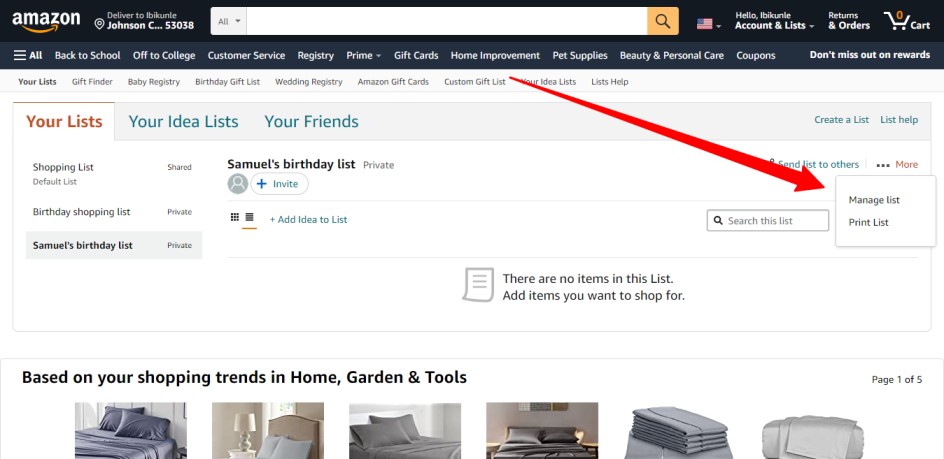
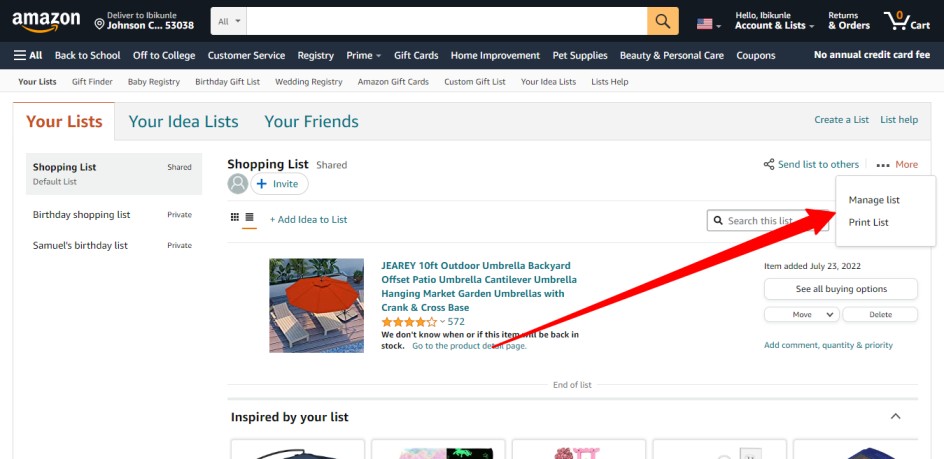
- This will redirect you to the list page. To change the settings, hover on More on the right side of the screen and select Manage List.
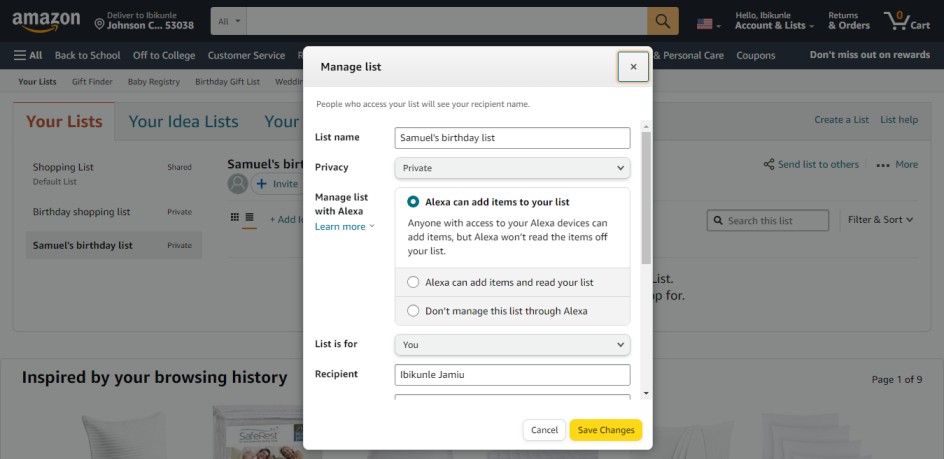
- The Manage List page contains customization options like:
- List Name: to change the name of your list.
- Privacy: to choose if you want your list to be public (anyone can view it), private (only you can see it), or shared (only specific people can view it).
- Manage List with Alexa: to choose whether to use an Amazon Echo or another Alexa-capable device to add items with voice commands.
- List Is For: to specify whether your list is for you or an organisation.
- Recipient: to set the name of the person or organisation the items people buy from the list will go to.
- Email: to set the email address of the recipient.
- Birthday
- Description: to give a short overview of the wish list. This field makes it easier for others to find your list by searching.
- Shipping Address: to set the location to which items people buy from the list will ship.
- Keep purchased items on your list: this allows you to specify whether items you or someone else purchases will remain on the list.
- Don’t spoil my surprises: Turn this option on to keep purchased items visible for a few weeks, so you don’t know what a gifter has bought. This backfires on a few occasions.
- The Delete List removes your wishlist from the website. Only use this option if you’re completely done with the page or want to start over.
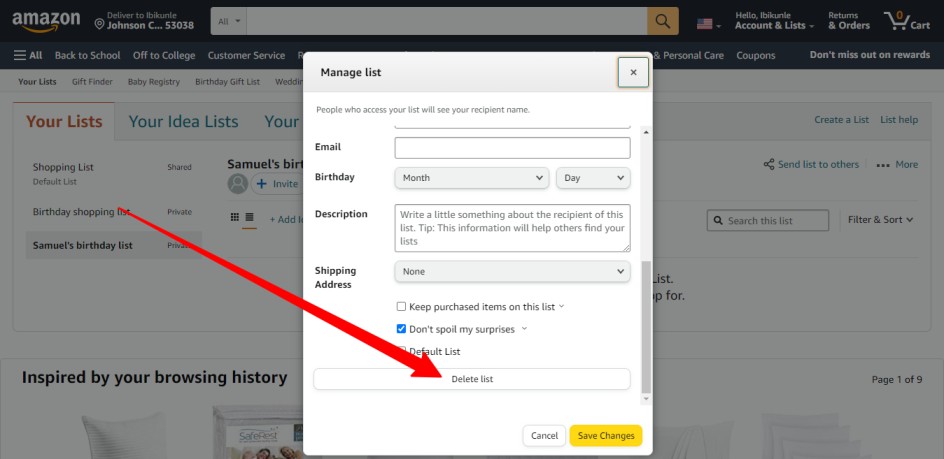
- You can then click Save changes and your changes will take effect.
How to add items to an Amazon wish list
Before we talk about how to share Amazon wish list, you may want to add items to your wish list and see if you’re doing it right.
- Browse for any item through the featured tab or the search bar.
- In the Buy box, select Add to List to add it to your default list or click the down arrow to select the list where you want to add it.
- You can now continue browsing as the item is added to your list.
How to share your wish list on Amazon
After creating a wish list and adding a few items to it, you’re ready to share your Amazon wish list with friends and family. If you have more than a list you want to share with someone, you’ll need to add them to each list separately with the steps below.
Here’s how to share Amazon wish list with friends and families:
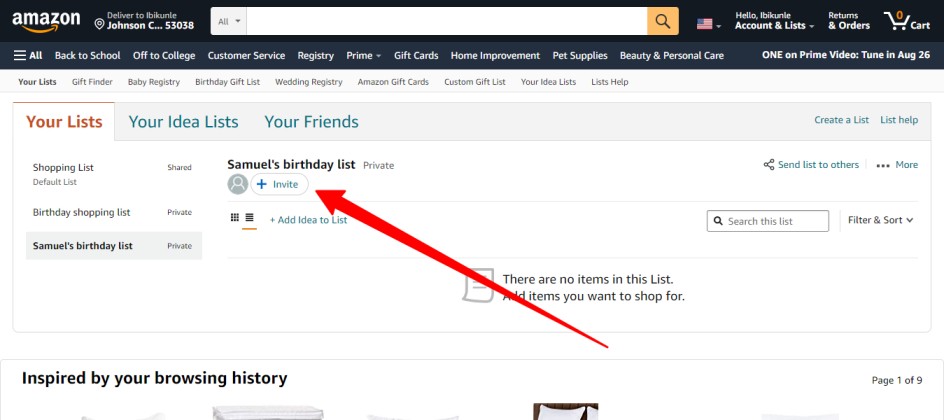
- Click on Your Lists.
- Select the list that you want to share.
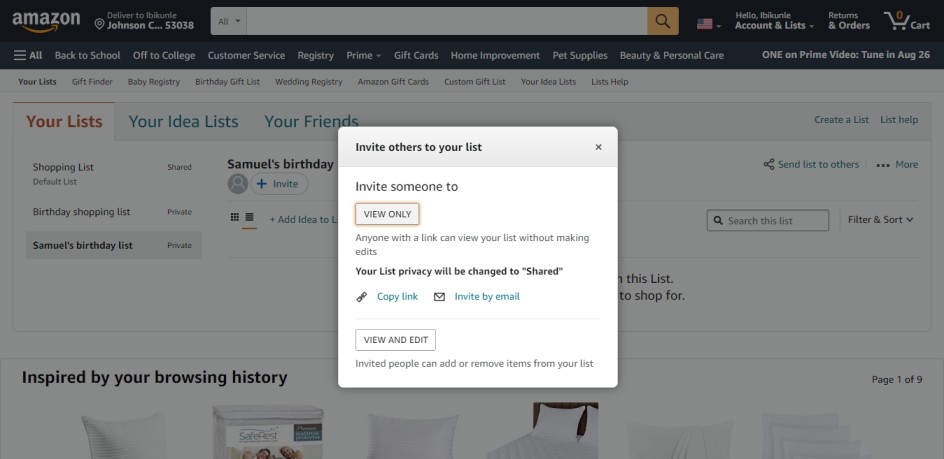
- Click the Invite Button.
- Set the privacy and permission as you want. Suppose you want to invite someone to see your list (but not be able to edit), tap View only.
- You can also select View and Edit if you want to allow this person to add products, remove items, and share the list with others.
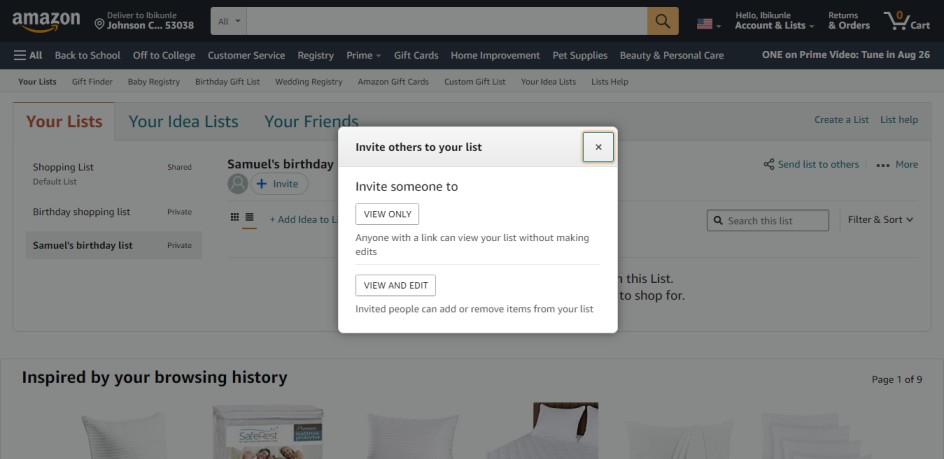
- You can now invite individuals to view your list. You will need to copy the link and share it with them through email or text message.
Once a list has been successfully shared with someone, it will appear in their friends’ lists section when they log into Amazon.
How to Remove People from Amazon Wish List
There are many reasons you may want to remove people from viewing an Amazon wish list you own after learning how to share Amazon wish list. You can easily remove individuals from your wish list at any time.
If you have multiple lists shared with a person, you will have to remove them individually from each list. Here’s how to remove someone from your Amazon wish list:
- Select the list you need to remove someone from.
- Tap your account profile avatar listing the number of people your list is shared with.
- Tap on the user within your Amazon wish list
- To remove an individual from your list, tap the “x” displayed beside their name.
- Tap on x to remove the user from your Amazon wish list
- Tap Remove to stop sharing your wish list with this individual.
- Remove button from Amazon wish list
Once you have successfully removed someone from your wish list, they will no longer have access to the list. In a case where you unintentionally remove someone from your Amazon wish list, you can always add them again by following the steps on how to share Amazon wish list.
How to change the privacy settings on a wishlist
You can make a wish list public today and decide to make it private tomorrow, or after sharing it with selected friends, you may decide to do something else with the list.
If there’s any change in plans, you can easily change the list from shared to private, update shipping information, or delete the entire list. Here’s how to change your Amazon wish list privacy settings.
- Hover over Accounts & Lists and select the list you want to make changes to.
- This will redirect you to a page where you can view the list. Look for the three dots and hover on this. From here you will need to click Manage list.
- You can now change the privacy settings on your account. You can choose one of private, public, or shared.